Showing posts with label Blogger Tutorials. Show all posts

How Can You Know the Speed of Your Blog/Website?

the speed of blog is very important for any blogger, not only for visitors but in order to gain the trust of the search engines. Guest blog loved if they were light and fast loading, as well as search engine spiders like fast loading pages that do not consume precious time.You have to strike a balance between the content and speed of your blog to achieve a difficult equation.

First click on  Blog Speed Test Tool ,and do such as the below screen.
Note: After you click on check! wait some seconds to loading the page.
That is all. ;)

How to Add a Shining CSS3 Horizontal Menu For Blogger

Horizontal menu best alternative option for labels or sections.
The importance of horizontal menu including: reducing the space occupied by the sections/labels and distort the appearance of blog, coordinate and beautify the style of blog.
This widget is designed by CSS3 technology, And you can add this gadget to your blog with very easy way:

Adding the widget to Blogger blog:
1. Go to Blogger Dashboard  → Layout → click on "Add a gadget".
2. Select "html/java script" and add the code given below:
<style type="text/css">.menu li{list-style:none;display:inline}.menu li a{-moz-transition:all 270ms ease-in-out 0s;-webkit-transition:all 310ms ease-in-out;-o-transition:all 270ms ease-in-out;background:url("https://blogger.googleusercontent.com/img/b/R29vZ2xl/AVvXsEgdKIO91f6Wdp2JnmkN94jqlQcFXtkvXy9g76LQmkMMZfepTifBVEdrngRaTTxWXxU0eOXsRNNJCwpS6JZyEcit6WDA-pxCDWARbOqymsLNUHPgbM-5Kl1UhkqjTDmJRYbhsu3IFQxC2-k/s1600/noop-menu-blogger.png") repeat scroll 0 0 transparent;border:1px solid #1357AF!important;border-radius:3px 3px 3px 3px;color:#FFFFFF!important;font:14px arial!important;padding:10px 38px!important;text-decoration:none;text-shadow:1px 1px 0 #000;margin-left:-5px}.menu li a:hover{background-position:right center!important}</style>
<a href="http://bbloggertutorials.blogspot.com" style="position: absolute;z-index:-11;"><img src="https://blogger.googleusercontent.com/img/b/R29vZ2xl/AVvXsEhIf_V-j9or8xXQ-cgZTVwBgv4qdh0_q5Bw3neb216VPvmrSuqet2dOzBsLyW2W-e3BlB5yF5yPMQ_NWg1JUZqDWq3L9LT4cxfB4ponxdfPrEOGlmTnKSv730s-3pYEyGKX2thhBIWgi2A/s1600/1x1juice.png" /></a>
<div class="wg-shining-menu">
    <ul class="menu">
        <li><a href="http://bbloggertutorials.blogspot.com/">Home</a></li>
        <li><a href="#">Features</a></li>
        <li><a href="http://bbloggertutorials.blogspot.com/p/blogger-tools.html">Products</a></li>
        <li><a href="http://bbloggertutorials.blogspot.com/p/contact-me.html">Contact</a></li>
        <li><a href="http://bbloggertutorials.blogspot.com/p/sitemap.html">Tips</a></li>
        <li><a href="http://bbloggertutorials.blogspot.com/p/terms-and-conditions.html">Tricks</a></li>
        <li><a href="#">About</a></li>
    </ul>

</div>
NOTE
3. - Replace the URL in blue with your own.
    - Replace the tab name in red with your own.
4. Finally click on save.
Now you can see the result  (o)

How to Add Metro Style Social Widget for Blogger

Today I will give you a very nice addition to your blog and frankly I liked this widget a lot. It is a social networking sites widget on the form of Metro as in windows 8.

Adding the widget in Layout
1. Go to Blogger Dashboard  → Layout → click on "Add a gadget".
2. Select "html/java script" and add the code given below.
<div class="metro-social">
<li><a class="fb" href="Your Facebook URL here"></a></li>
<li><a class="tw" href="Your Twitter URL here"></a></li>
<li><a class="gp" href="Your GooGle + URL here"></a></li>
<li><a class="fd" href="Your FeedBurner URL here"></a></li>
</div>
<style>
/*Metro UI Social Profile Widget v2.0 by Tech Prevue Labs
Web link to gadget code: 
Distributed under license CC BY-NC-ND 3.0 INT
Please keep license information intact while using this widget*/
.metro-social{width:285px}
.metro-social li{position:relative;cursor:pointer;padding:0;list-style:none}
.metro-social .fb,.tw,.gp,.fd{z-index:7;float:left;margin:1px;position:relative;display:block}
.metro-social .fb{background:url(//goo.gl/6xmUk) no-repeat center center #1f69b3;width:140px;height:141px}
.metro-social .tw{background:url(//goo.gl/oyiFK) no-repeat center center #43b3e5;width:140px;height:70px}
.metro-social .gp{background:url(//goo.gl/oT0kF) no-repeat center center #da4a38;width:140px;height:69px}
.metro-social .fd{background:url(//goo.gl/ncoLY) no-repeat center center #e9a01c;width:282px;height:69px}
.metro-social li:hover .fb{background:url(//goo.gl/MH8AP) no-repeat center center #1f69b3}
.metro-social li:hover .tw{background:url(//goo.gl/hHRHv) no-repeat center center #43b3e5}
.metro-social li:hover .gp{background:url(//goo.gl/wva4B) no-repeat center center #da4a38}
.metro-social li:hover .fd{background:url(//goo.gl/JFGqn) no-repeat center center #e9a01c}
</style>
<br />
3. Replace "Your ..... URL here" with Your URL.
4. Click on save.
I hope you enjoy & happy blogging! :)

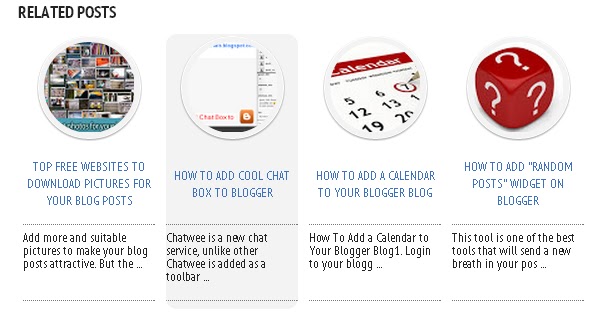
How To Add Related Posts Widget To Blogger With Summary

I wrote a previous blog post about How To Add Related Posts Widget To Blogger With Thumbnails.We already know the importance of the widget, but in this tutorial I'll show you the best related posts widget to your blog , If you want to add this widget to your blog please follow me:

1. Go to Blogger Dashboard  --> Template
2. Please! download  a copy of your template
3. Now click on Edit HTML
4. Use Ctrl+F to find </head>
5. Then copy and paste the below code just above/before it ( </head> ):
<script type='text/javascript'>
//<![CDATA[
var relatedTitles = new Array();
var relatedUrls = new Array();
var relatedpSummary = new Array();
var relatedThumb = new Array();
var relatedTitlesNum = 0;

var relatedPostsNum = 4; // number of entries to be shown
var relatedmaxnum = 75; // the number of characters of summary
var relatednoimage = "https://blogger.googleusercontent.com/img/b/R29vZ2xl/AVvXsEgHzzs0ZW_PjZye3fdfCtUZecfnD52RlVW2ZuGrSAPIVwmpdaMlnPyG7sY6CEPrhBCx10_-Zk71hIDLAVG25QmzwG5Cim8jGvnwa9CCFwtbMl7HgubVryWCORyNmV8gz-WlMgg3tUdI1sWQ/s1600/no_image.jpg"; // default picture for entries with no image

function readpostlabels(json) {
  var entry, postimg, postcontent, cat;
  for (var i = 0; i < json.feed.entry.length; i++) {
    entry = json.feed.entry[i];
    if (i==json.feed.entry.length) { break; }
    relatedTitles[relatedTitlesNum] = entry.title.$t;
    postcontent = "";
    if ("content" in entry) {
      postcontent = entry.content.$t;
    } else if ("summary" in entry) {
      postcontent = entry.summary.$t;
    }
    relatedpSummary[relatedTitlesNum] = removetags(postcontent,relatedmaxnum);
    if ("media$thumbnail" in entry) {
      postimg = entry.media$thumbnail.url;
    } else {
      postimg = relatednoimage;
    }
    relatedThumb[relatedTitlesNum] = postimg;
    for (var k = 0; k < entry.link.length; k++) {
      if (entry.link[k].rel == 'alternate') {
        relatedUrls[relatedTitlesNum] = entry.link[k].href;
        break;
      }
    }
    relatedTitlesNum++;
  }
}
function showrelated() {
  var tmp = new Array(0);
  var tmp2 = new Array(0);
  var tmp3 = new Array(0);
  var tmp4 = new Array(0);
  for(var i = 0; i < relatedUrls.length; i++) {
    if(!contains(tmp, relatedUrls[i])) {
      tmp.length += 1; tmp[tmp.length - 1] = relatedUrls[i];
      tmp2.length += 1; tmp2[tmp2.length - 1] = relatedTitles[i];
      tmp3.length += 1; tmp3[tmp3.length - 1] = relatedpSummary[i];
      tmp4.length += 1; tmp4[tmp4.length - 1] = relatedThumb[i];
    }
  }
  relatedTitles = tmp2; relatedUrls = tmp; relatedpSummary = tmp3; relatedThumb = tmp4;
  for(var i = 0; i < relatedTitles.length; i++){
    var index = Math.floor((relatedTitles.length - 1) * Math.random());
    var tempTitle = relatedTitles[i]; var tempUrls = relatedUrls[i];
    var tempResum = relatedpSummary[i]; var tempImage = relatedThumb[i];
    relatedTitles[i] = relatedTitles[index]; relatedUrls[i] = relatedUrls[index];
    relatedpSummary[i] = relatedpSummary[index]; relatedThumb[i] = relatedThumb[index];
    relatedTitles[index] = tempTitle; relatedUrls[index] = tempUrls;
    relatedpSummary[index] = tempResum; relatedThumb[index] = tempImage;
  }
  var somePosts = 0;
  var r = Math.floor((relatedTitles.length - 1) * Math.random());
  var relsump = r; 
  var output;
  var dirURL = document.URL;

  while (somePosts < relatedPostsNum) {
    if (relatedUrls[r] != dirURL) {

      output = "<div class='relatedsumposts'>";
      output += "<a href='" + relatedUrls[r] + "' rel='nofollow'  target='_self' title='" + relatedTitles[r] + "'><img src='" + relatedThumb[r] + "' /></a>";
      output += "<h6><a href='" + relatedUrls[r] + "' target='_self'>" + relatedTitles[r] + "</a></h6>";
      output += "<p>" + relatedpSummary[r] + " ... </p>";
      output += "</div>";
      document.write(output);
      
      somePosts++;
      if (somePosts == relatedPostsNum) { break; }
    }
    if (r < relatedTitles.length - 1) {

      r++;
    } else {
      
      r = 0;
    }

    if(r==relsump) { break; }
  }
}
function removetags(text,length){
  var pSummary = text.split("<");
  for(var i=0;i<pSummary.length;i++){
    if(pSummary[i].indexOf(">")!=-1){
      pSummary[i] = pSummary[i].substring(pSummary[i].indexOf(">")+1,pSummary[i].length);
    }
  }
  pSummary = pSummary.join("");
  pSummary = pSummary.substring(0,length-1);
  return pSummary;
function contains(a, e) {
  for(var j = 0; j < a.length; j++) if (a[j]==e) return true;
  return false;
}
//]]>
</script>

Note:
- To change the default picture, replace the URL in pink with your own
- For displaying more than 4 posts or less, replace modify the value in red (4)
To change the number of characters to be shown in posts summary, modify the value in blue (75)
5. Now Search the following code:
<a expr:href='data:label.url' rel='tag'><data:label.name/></a><b:if cond='data:label.isLast != &quot;true&quot;'>,</b:if>
6. Just after it, copy and paste the below code:
<b:if cond='data:blog.pageType == &quot;item&quot;'>
    <script expr:src='&quot;/feeds/posts/default/-/&quot; + data:label.name + &quot;?alt=json-in-script&amp;callback=readpostlabels&amp;max-results=50&quot;' type='text/javascript'/>
  </b:if>
7. Now find the following code:
</b:includable>          
                <b:includable id='postQuickEdit' var='post'>
8. Then copy and paste the below code just above/before it
<b:if cond='data:blog.pageType == &quot;item&quot;'>
  <div class='post-footer-line post-footer-line-4'>
    <div id='relatedpostssum'><div style='text-align: left; font-size: 15px; margin-bottom: 10px; font-weight: bold;'>RELATED POSTS</div>
      <script type='text/javascript'>showrelated();</script>
    </div>
    <div style='clear:both;'/>
  </div>
</b:if>
9.  Finally search for this tag:  ]]></b:skin>
10. Add below CSS code just above it,
<relatedsumposts {
  float: left;
  margin: 0px 5px;
  overflow: hidden;
  text-align: center;
  /* width and height of the related posts area */
  width: 120px;
  height: 210px;
}

.relatedsumposts:hover { 
background-color: #F3F3F3; -webkit-border-radius: 10px;
-moz-border-radius: 10px;
border-radius: 10px;
}

.relatedsumposts img:hover {
-khtml-opacity:0.4;
-moz-opacity:0.4;
opacity:0.4;
}

.relatedsumposts a {
  /* link properties */
color: #linkcolor;
  display: inline;
  font-size: 10px;
  line-height: 1;
}
.relatedsumposts img {
  /* thumbnail properties */
margin-top: 2px;
  height: 82px;
  padding: 5px;
  width: 82px;
border: 1px solid #fff;
-webkit-border-radius: 100px;
-moz-border-radius: 100px;
border-radius: 100px;
-webkit-box-shadow: 0 1px 2px rgba(0, 0, 0, .4);
-moz-box-shadow: 0 1px 2px rgba(0, 0, 0, .4);
box-shadow: 0 1px 2px rgba(0, 0, 0, .4);
}
.relatedsumposts h6 {
  /* title properties */
  display: table-cell;
  height: 5em;
  margin: 5px 0 0;
  overflow: hidden;
  padding-bottom: 2px;
  vertical-align: middle;
  width: 130px;
}

.relatedsumposts p {
  /* summary properties */
border-top: 1px dotted #777777;
border-bottom: 1px dotted #777777;
color: #summarycolor;
  font-size: 10px;
  height: 4em;
  line-height: 1;
  margin: 5px 0 0;
  overflow: hidden;
  padding: 5px 0 15px 0;
  text-align: left;
}
Note:
-Modify the values in red to adjust the width (120) and height (210) of the widget area
-Replace #linkcolor with the hex value of your color to change the color of post titles
-To change the size of thumbnails, modify the values marked in pink (82)
-To determine the border roundness, modify the values in green (100)
-To change the color of the post snippet, change #summarycolor with color hex value
11. Now take a preview and save your template.

How To Remove Blogger Attribution Gadget in Blogger Blog

Some of the templates in blogger, we find some tools that can not be deleted, and unfortunately, these tools can distort the form template.The reason is that the template designer making tool locked so as to protect it, and to unlocked it follow me:

1. Go to Blogger Dashboard  --> Template
2. Please! download  a copy of your template
3. Now click on Edit HTML
4. Use Ctrl+F to find Attribution
5. We change the option 'true' to option 'false' ( Look the screen )
6. To become like this <b:widget id='Attribution1' locked='false' title='' type='Attribution'>
7. Finally click on Save template
Now go to gadget which you want remove it.

How To Add Stylish Floating Facebook Like Box Widget In Blogger

Today we will learn how to add facebook like box to blogger blog with a distinctive view, wonderful and attractive format, where the facebook like box is hidden on the right side of the screen and shows only the passage of the cursor on it. to add this widget to your blog,follow these two simple steps:

STEP 1
1.  Go to Blogger Dashboard  --> Template
2.  Please! download  a copy of your template
3.  Now click on Edit HTML
4.  Use Ctrl+F to find </head>
5.  Then copy and paste just above/before it, this code:
<script src='https://ajax.googleapis.com/ajax/libs/jquery/1.6.1/jquery.min.js' type='text/javascript'/>
6. Save your template.

STEP 2
1.  Now go to Layout--> click on "Add a gadget".
2.  Select "html/java script" and add the code given below and click save.
  <script type="text/javascript"> /*<![CDATA[*/ jQuery(document).ready(function() {jQuery(".abtlikebox").hover(function() {jQuery(this).stop().animate({right: "0"}, "medium");}, function() {jQuery(this).stop().animate({right: "-250"}, "medium");}, 500);}); /*]]>*/ </script> <style type="text/css"> .abtlikebox{background: url("https://blogger.googleusercontent.com/img/b/R29vZ2xl/AVvXsEhoRjqGlenT47z1llBXyip6zcGvz1KDI86l6_j-u8kQtlFPoMh4GLYqA7bzRkTufH7xVExY3wHq9mN7k0xG9pqPPJgnR8EIQFl_XKtKW4dNTkwdN6p4kUlfvciO8w26tHxXbqjDgVGigTI/s320/fb1-right.png") no-repeat scroll left center transparent !important; float: right;height: 270px;padding: 0 5px 0 46px;width: 245px;z-index:  99999;position:fixed;right:-250px;top:20%;} .abtlikebox div{ padding: 0; margin-right:-8px; border:4px solid  #3b5998; background:#fafafa;} .abtlikebox span{bottom: 4px;font: 8px "lucida grande",tahoma,verdana,arial,sans-serif;position: absolute;right: 6px;text-align: right;z-index: 99999;} .abtlikebox span a{color: gray;text-decoration:none;} .abtlikebox span a:hover{text-decoration:underline;} } </style> <div class="abtlikebox" style="">     <div>     <iframe src="http://www.facebook.com/plugins/likebox.php?href=http%3A%2F%2Ffacebook.com%2Fbbloggertutorials&amp;width=245&amp;colorscheme=light&amp;show_faces=true&amp;border_color=white&amp;connections=9&amp;stream=false&amp;header=false&amp;height=270" scrolling="no" frameborder="0" scrolling="no" style="border: white; overflow: hidden; height: 270px; width: 245px;background:#fafafa;"></iframe><span>Widget by :<a href="http://www.bbloggertutorials.blogspot.com"> BBloggerTutorials</a></span>     </div> </div>
Note: Replace bbloggertutorials with your facebook page URL or user name.
Now you can see the result and be happy. :-d

How to Add a Logo to Your Blog on Blogger

There are many simple tools that give excellence for blogs, including the design of  template and colors ... etc., today we will learn how to add a logo to your blogger blog , which is an image or text excellence your blog from the rest of other blogs, and the benefits of logo is keeping visitors to your blog and also give her aesthetic.

1. Go to "Blogger Dashboard" > "Layout" "Edit" like the following screen

2. After click on "Editwill appears for you this pop up.
3. Click on ''Choose File'' and upload your logo image from you computer or paste your image url in "From the web. Paste an image URL below" box.
4. Select ''Instead of this description" like the above screen.
5. Finally click on save button.

Free Flash Games For Your Website or Blog

HTML code contains more than 400 games, which is free to your website/blog, These games provided by www.freegaming.de .


To do this just follow me:
- Simply copy the following code (Html) to your Homepage,Blog,EMail or Website.
<iframe src="http://www.freeonlinegamesplay247.com/webmastercontent/fungames.php" style="border:0px #FFFFFF none;" border="0" name="FunGames Collection" scrolling="auto" frameborder="0" marginheight="0px" marginwidth="0px" height="700" width="600"></iframe>

Note: Edit the "height="700" and the "width="600" parameter to fit your personal needs.

How to Add Smileys/Emoticons in Blogger Comments

The Smileys/Emoticons way to give the visitors a lot of fun and confidence to your blog,It is known that these smileys used in social websites as Facebook.
To do this just follow the steps:

1.  Go to Blogger Dashboard  --> Template
2.  Please! download  a copy of your template
3.  Now click on Edit HTML
4.  Use Ctrl+F to find </body>
5.  Then copy and paste just  above/before it, this code:
<b:if cond='data:blog.pageType == "item"'>
<script type='text/javascript'>
//<![CDATA[
jQuery(document).ready(function () {emoticonx({
emoRange:"#comments p, div.emoWrap",
putEmoAbove:"iframe#comment-editor",
topText:"Click to see the code!",
emoMessage:"To insert emoticon you must added at least one space before the code."
})
});
//]]>
</script>
<script src='https://boyz.googlecode.com/svn/JS/emoticonnya.js' type='text/javascript'/>
</b:if>

Note: You can change blue with your own words.
6. Now the next step to find the code ]]></b:skin>
7. Then copy and paste just  above/before it, this code:
.emoWrap {
  position:relative;
  padding:10px;
  margin-bottom:7px;
  background:#fff;
/* IE10 Consumer Preview */
background-image: -ms-linear-gradient(right, #FFFFFF 0%, #FFF9F2 100%);
/* Mozilla Firefox */
background-image: -moz-linear-gradient(right, #FFFFFF 0%, #FFF9F2 100%);
/* Opera */
background-image: -o-linear-gradient(right, #FFFFFF 0%, #FFF9F2 100%);
/* Webkit (Safari/Chrome 10) */
background-image: -webkit-gradient(linear, right top, left top, color-stop(0, #FFFFFF), color-stop(1, #FFF9F2));
/* Webkit (Chrome 11+) */
background-image: -webkit-linear-gradient(right, #FFFFFF 0%, #FFF9F2 100%);
/* W3C Markup, IE10 Release Preview */
background-image: linear-gradient(to left, #FFFFFF 0%, #FFF9F2 100%);
  border:3px solid #860000;
  -moz-border-radius:5px;
  -webkit-border-radius:5px;
  border-radius:5px;
  box-shadow:0 4px 6px rgba(0,0,0,0.1),0 1px 1px rgba(0,0,0,0.3);
  -moz-box-shadow:0 4px 6px rgba(0,0,0,0.1),0 1px 1px rgba(0,0,0,0.3);
  -webkit-box-shadow:0 4px 6px rgba(0,0,0,0.1),0 1px 1px rgba(0,0,0,0.3);
  box-shadow:0 2px 6px rgba(0,0,0,0.1),0 1px 1px rgba(0,0,0,0.3);
  font-weight:normal;
  color:#333;
}
.emoWrap:after {
  content:"";
  position:absolute;
  bottom:-10px;
  left:10px;
  border-top:10px solid #860000;
  border-right:20px solid transparent;
  width:0;
  height:0;
  line-height:0;
}
8. Add the below code above/before </head>
<script src='https://ajax.googleapis.com/ajax/libs/jquery/1.8.3/jquery.min.js' type='text/javascript'/
9. Finally click save template.
Now you can see the result and be happy. :-d